Engine
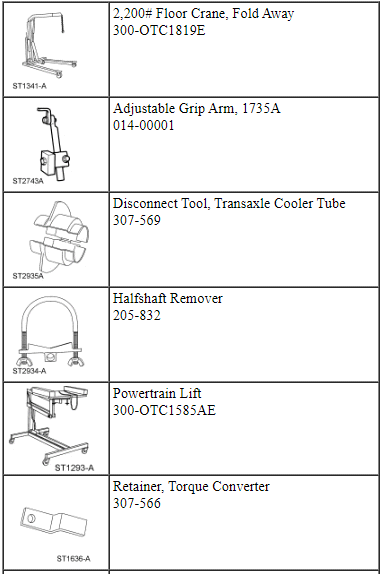
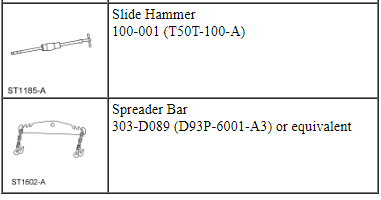
Special Tool(s)
WARNING: Do not smoke, carry lighted tobacco or have an open flame of any type when working on or near any fuel-related component. Highly flammable mixtures are always present and may be ignited. Failure to follow these instructions may result in serious personal injury.
- With the vehicle in NEUTRAL, position it on a hoist. For additional information, refer to Section 100-02.
- Release the fuel system pressure. For additional information, refer to Section 310-00.
- Drain the engine cooling system. For additional information, refer to Section 303-03.
- Remove the cowl panel grille. For additional information, refer to Section 501-02.
- Remove the engine ACL and ACL outlet pipe assembly. For additional information, refer to Section 303-12.
- Remove the battery tray. For additional information, refer to Section 414-01.
- Remove the nut and disconnect the power feed from the battery terminal.
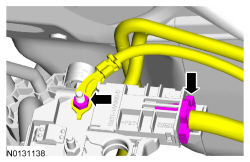
- Remove the nut and ground wire.
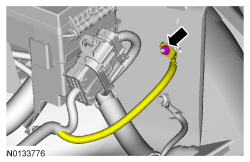
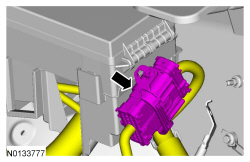
- Disconnect the wiring harness electrical connector.
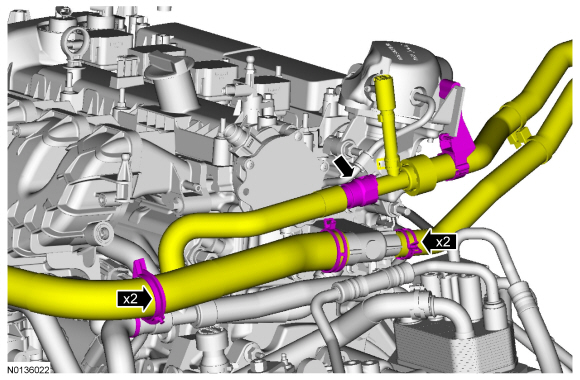
- Loosen the 2 clamps and disconnect the upper radiator hose and the
heater hose.
- Disconnect the heater hose quick connect coupling.
- Detach the hoses from the 2 retaining clips.
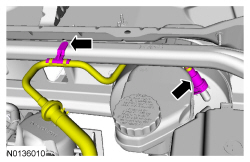
- Disconnect the vacuum tube quick connect coupling from the power brake
booster. For additional information, refer to Section 310-00.
- Detach the vacuum tube retaining clip.
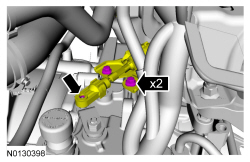
- Disconnect the transaxle selector lever cable end from the manual control lever, remove the 2 bracket bolts and position the selector lever cable and bracket aside.
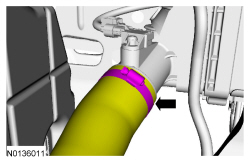
- Loosen the clamp and disconnect the CAC outlet tube.
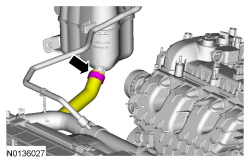
- Loosen the clamp and disconnect the coolant hose from the degas bottle.
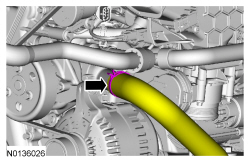
- Loosen the clamp and disconnect the lower radiator hose from the engine.
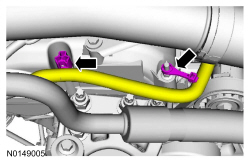
- Detach the 2 wiring harness retainers from the valve cover stud bolts.
- Loosen the clamp and disconnect the CAC inlet tube.
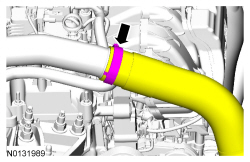
- Disconnect the fuel supply tube quick connect coupling. For additional information, refer to Section 310-00.
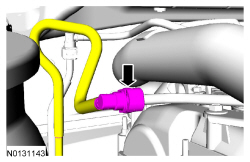
- Disconnect the EVAP tube from the EVAP purge valve. For additional information, refer to Section 310-00.
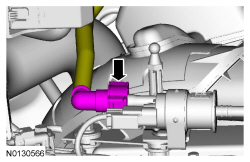
- Remove the bolt and the ground wire from the RH inner fender.
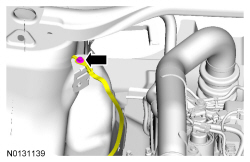
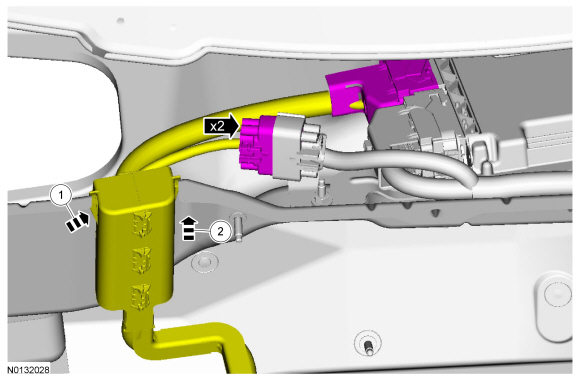
- Disconnect the 2 wiring harness electrical connectors.
- Push the wiring harness retainer tab in.
- Slide the wiring harness up and off of the bulkhead.
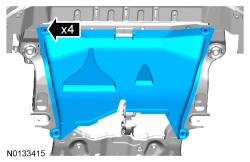
- Loosen the 4 retainers and remove the underbody shield.
- Remove the catalytic converter. For additional information, refer to Section 309-00.
- Remove the engine roll restrictor. For additional information, refer to Section 307-01B.
- Remove the front subframe. For additional information, refer to Section 502-00.
- Remove the 2 secondary latches from the transaxle fluid cooler tubes.
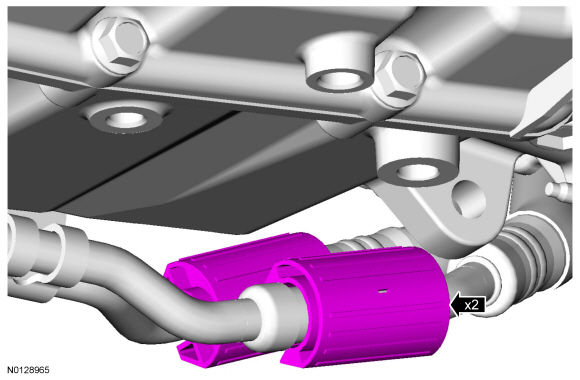
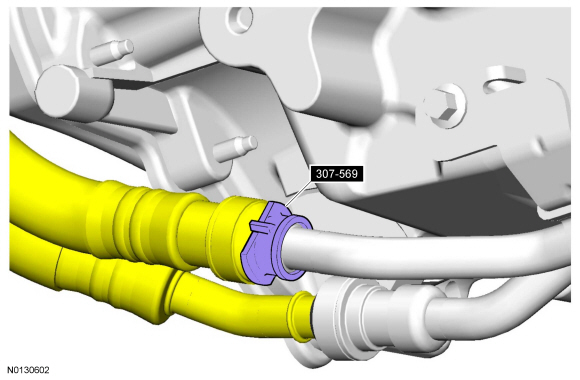
- Using the Transaxle Cooler Tube Disconnect Tool, disconnect the transaxle cooling tubes.
- Remove the 2 transaxle-to-oil pan bolts.
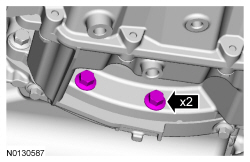
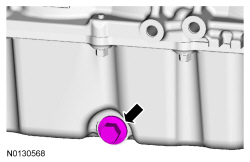
- Remove the drain plug and drain the engine oil.
- Install the drain plug and tighten to 27 Nm (20 lb-ft).
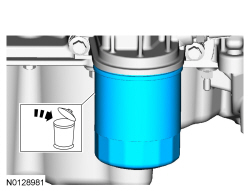
- Remove and discard the engine oil filter.
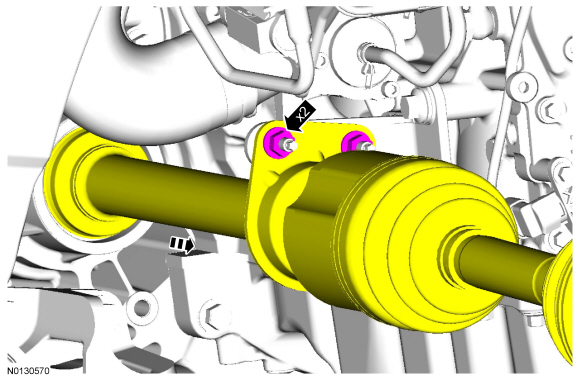
- Remove the 2 nuts and slide the RH halfshaft assembly out of the
transaxle.
- Position the halfshaft aside and support with a length of mechanics wire.
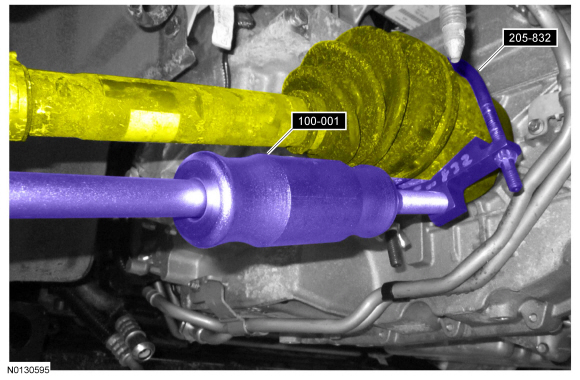
- Using the Halfshaft Remover and Slide Hammer, separate the halfshaft
from the transmission.
- Position the halfshaft aside and support with a length of mechanics wire.
- Remove the A/C compressor drive belt. For additional information, refer to Section 303-05.
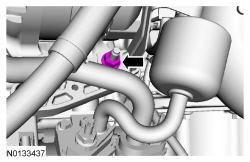
- Remove the A/C tube bracket nut.
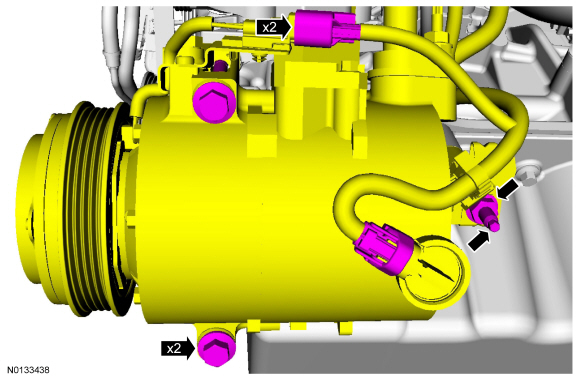
- Disconnect the 2 A/C compressor electrical connectors.
- Detach the wiring harness retainer from the A/C tube stud bolt.
- Remove the A/C compressor nut, stud and the 2 bolts.
- Position the A/C compressor aside and support with a length of mechanics wire.
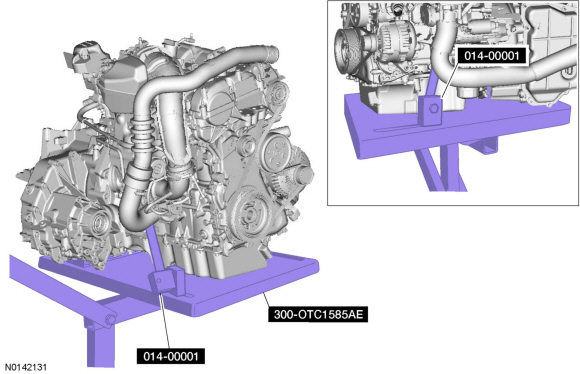
- NOTE: Position a block of wood under the transaxle.
Install the Powertrain Lift and Adjustable Grip Arms.
- Remove the transaxle support insulator through bolt and nut.
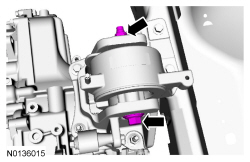
- Remove the 3 nuts, the bolt and the transaxle support insulator bracket.
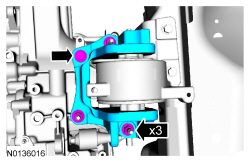
- Remove the 4 nuts, the 3 bolts and the engine mount.
- Lower the engine and transaxle assembly from the vehicle.
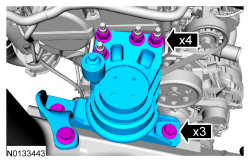
- Remove the starter cable cover and the 2 nuts.
- Detach the 2 wire terminals from the starter.
- Remove the nut and the ground wire from the starter stud bolt.
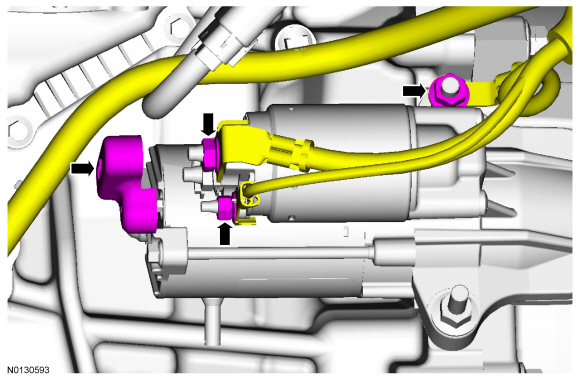
- Remove the 2 stud bolts and the starter.
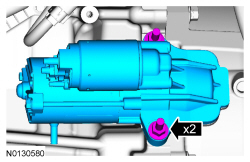
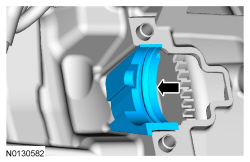
- Remove the starter insulator.
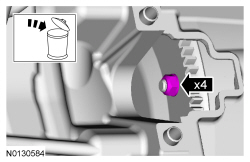
- NOTICE: Only rotate the engine in a clockwise direction or
engine damage will occur.
NOTE: Mark one stud and the flexplate for assembly reference.
Remove and discard the 4 torque converter nuts.
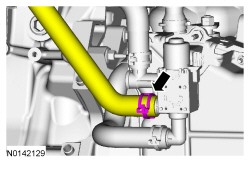
- Disconnect the coolant hose from the transmission fluid temperature control valve.
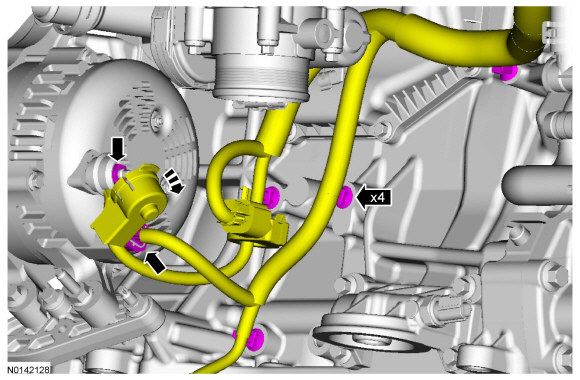
- Position the generator cap aside and remove the nut and wire terminal.
- Disconnect the wire harness electrical connector.
- Detach the 4 wiring harness retainers from the engine.
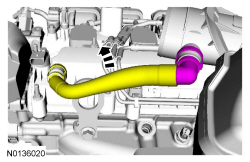
- Disconnect the PCV tube from the turbocharger inlet pipe and position it aside.
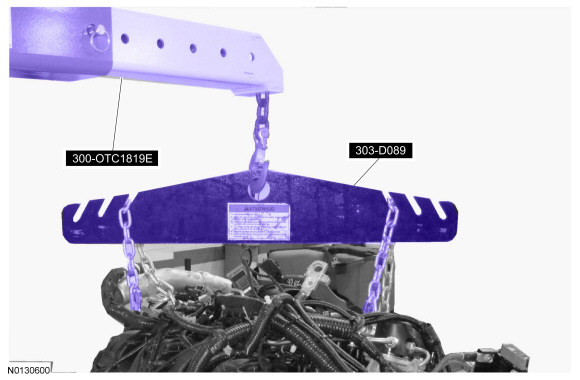
- Using the Floor Crane and Spreader Bar, remove the engine and transaxle from the powertrain table.
- Detach the 2 wiring harness retainers.
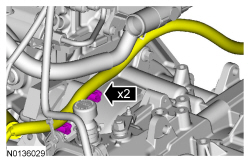
- Detach the 2 wiring harness retainers.
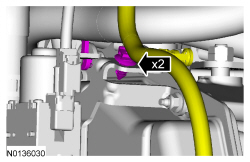
- Disconnect the 2 transaxle electrical connectors.
- Detach the 2 wiring harness retainers.
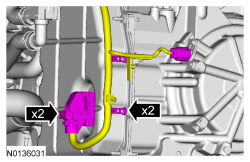
- Remove the 3 transaxle-to-engine bolts.
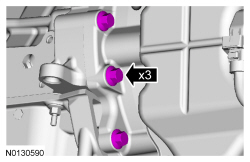
- Remove the 3 engine-to-transaxle bolts.
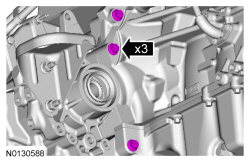
- Remove the transaxle-to-engine bolt and 2 stud bolts.
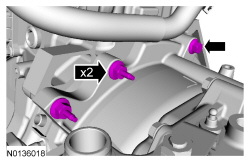
- Separate the engine and transaxle.
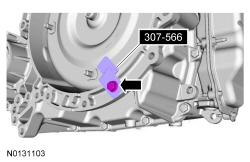
- Install the Torque Converter Retainer and bolt.
 In-Vehicle Repair
Intake Manifold
Removal
With vehicle in NEUTRAL, position it on a hoist. For additional
information, refer to Section 100-02.
Loosen the 4 retainers and remove the underbody shield.
...
 Disassembly
Engine
Special Tool(s)
Material
NOTICE: Do not loosen or remove the crankshaft pulley bolt without
first installing the special tools as instructed in this procedure. The
crankshaft pulley ...
Other materials:
Disassembly and Assembly of Subassemblies
Cylinder Head
Special Tool(s)
Material
Cylinder Head
NOTE: RH shown, LH similar.
Disassembly
NOTE: If the components are to be reinstalled, they must be installed
in the same positions. Mark the components for installation into their original
locations.
Using the Valve Spring Comp ...
Tire Pressure Monitoring System (TPMS)
WARNING: The tire pressure monitoring system is NOT a
substitute for manually checking tire pressure. The tire pressure
should be checked periodically (at least monthly) using a tire gauge.
See Inflating Your Tires in this chapter. Failure to properly maintain
your tire pressure could increase ...
General Procedures
Solenoid Body Identification Procedure
Original Solenoid Body Service Tag
Using the scan tool, select Powertrain, Transmission and Transmission
Solenoid Body Identification from the toolbox icon and follow the
instructions displayed on the scan tool.
The solenoid body identification screen di ...
