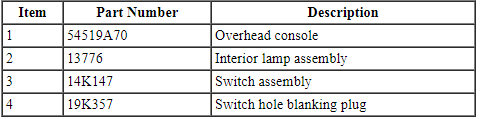
Roof Opening Panel - Exploded View
NOTE: The roof opening panel motor must be initialized when repairs are carried out on any part of the roof opening panel system, including: whenever the roof opening panel motor has been removed from the roof opening panel system, the roof opening panel glass has been removed from the roof opening panel system, the roof opening panel assembly has been removed from the vehicle, a new roof opening panel motor has been installed, a new roof opening panel glass has been installed or a new roof opening panel assembly has been installed. For additional information, refer to Roof Opening Panel Motor Initialization in this section.
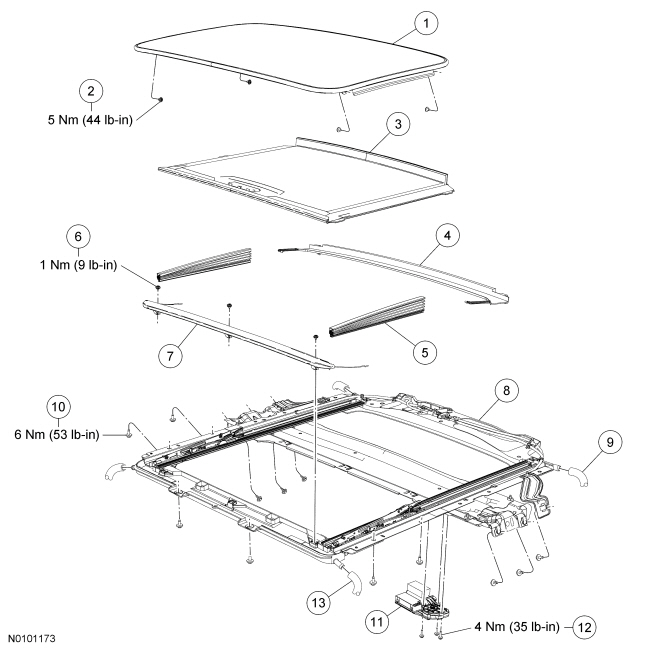
- For additional information, refer to the procedures in this section.
Roof Opening Panel Glass
Removal and Installation
NOTE: The roof opening panel motor must be initialized when repairs are carried out on any part of the roof opening panel system, including: whenever the roof opening panel motor has been removed from the roof opening panel system, the roof opening panel glass has been removed from the roof opening panel system, the roof opening panel assembly has been removed from the vehicle, a new roof opening panel motor has been installed, a new roof opening panel glass has been installed or a new roof opening panel assembly has been installed. For additional information, refer to Roof Opening Panel Motor Initialization in this section.
- Open the roof opening panel to the VENT position.
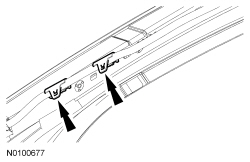
- Remove the 4 roof opening panel glass screws.
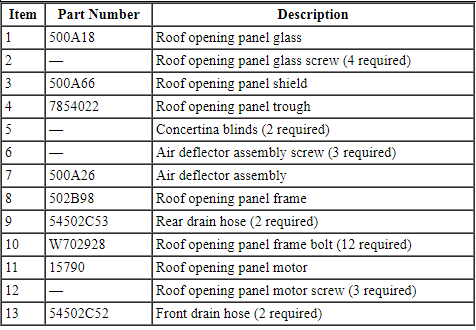
- To access the glass screws, unclip the top portion of the concertina blind and position aside as shown.
- To install, tighten to 5 Nm (44 lb-in) and make sure the concertina blind is clipped correctly back in place.
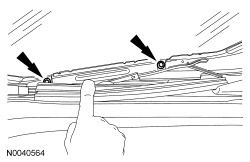
- From the outside of the vehicle, remove the roof opening panel glass assembly.
- To install, reverse the removal procedure.
- Check for correct alignment of the roof opening panel. For additional information, refer to Roof Opening Panel Alignment in this section.
- Initialize the roof opening panel motor. For additional information, refer to Roof Opening Panel Motor Initialization in this section.
Roof Opening Panel Shield
Removal and Installation
- Remove the roof opening panel glass. For additional information, refer to Roof Opening Panel Glass in this section.
- Remove the trough assembly. For additional information, refer to Trough Assembly in this section.
- Slide the roof opening panel shield forward halfway.
- Disengage the roof opening panel shield guide feet.
- Lift the front portion of the roof opening panel shield upward at the center until the front guide feet disengage and then proceed towards the rear until all the guide feet are disengaged and the roof opening panel shield is removed from the vehicle.
- To install, reverse the removal procedure.
Roof Opening Panel Motor
Removal and Installation
NOTE: Anytime a roof opening panel motor is removed, the cables/mechanisms can experience free-play movement. It is important that the cables do not move. They are timed to be parallel with each other. If one or both are moved in either direction, they must be re-timed. For additional information, refer to Timing Adjustment in this section.
NOTE: The roof opening panel motor must be initialized when repairs are carried out on any part of the roof opening panel system, including: whenever the roof opening panel motor has been removed from the roof opening panel system, the roof opening panel glass has been removed from the roof opening panel system, the roof opening panel assembly has been removed from the vehicle, a new roof opening panel motor has been installed, a new roof opening panel glass has been installed or a new roof opening panel assembly has been installed. For additional information, refer to Roof Opening Panel Motor Initialization in this section.
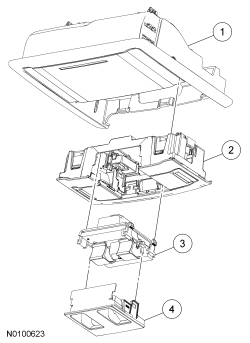
NOTE: For overhead console exploded view information, refer to Section 501-05.
- Close the roof opening panel glass.
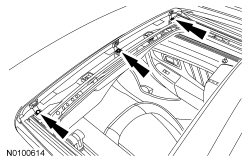
- Remove the 3 passenger assist handles.
- If equipped, disconnect the electrical connectors.
- Remove the A-pillar trim panels. For additional information, refer to Section 501-05.
- NOTE: RH shown, LH similar.
Disconnect the 4 A-pillar wiring retainer clips.
- Remove the B-pillar trim panels. For additional information, refer to Section 501-05.
- Remove the C-pillar trim panels. For additional information, refer to Section 501-05.
- Remove the overhead console.
- Disconnect the electrical connectors.
- If equipped, disconnect the automatic-dimming rear view mirror electrical connector.
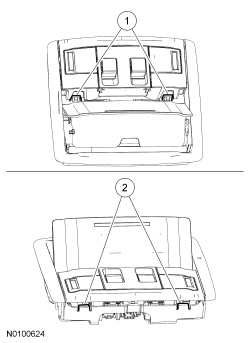
- Remove the sun visors and sun visor clips.
- If equipped, disconnect the electrical connectors.
- Remove the 2 headliner pushpins at the rear.
- Remove the 2 headliner pushpins at the front.
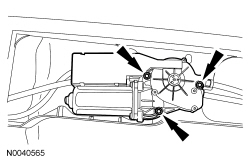
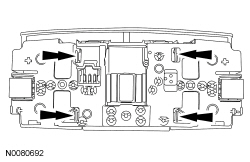
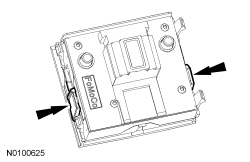
- Remove the 3 roof opening panel motor screws and the roof opening panel
motor.
- Disconnect the electrical connector.
- To install, tighten to 4 Nm (35 lb-in).
- To install, reverse the removal procedure.
- Initialize the roof opening panel motor. For additional information, refer to Roof Opening Panel Motor Initialization in this section.
Roof Opening Panel Frame
Removal and Installation
NOTE: The roof opening panel motor must be initialized when repairs are carried out on any part of the roof opening panel system, including: whenever the roof opening panel motor has been removed from the roof opening panel system, the roof opening panel glass has been removed from the roof opening panel system, the roof opening panel assembly has been removed from the vehicle, a new roof opening panel motor has been installed, a new roof opening panel glass has been installed or a new roof opening panel assembly has been installed. For additional information, refer to Roof Opening Panel Motor Initialization in this section.
NOTE: Anytime a roof opening panel motor is removed, the cables/mechanisms can experience free-play movement. It is important that the cables do not move. They are timed to be parallel with each other. If one or both are moved in either direction, they must be re-timed. For additional information, refer to Timing Adjustment in this section.
- Remove the safety canopy module. For additional information, refer to Section 501-20B.
- Disconnect the 4 roof opening panel drain hoses from the corners of the roof opening panel frame.
- NOTE: To avoid damage to the roof opening panel frame, be sure to
support the roof opening panel frame when removing the roof opening panel
frame bolts.
Remove the 12 roof opening panel frame bolts.
- To install, tighten to 6 Nm (53 lb-in).
- Remove the roof opening panel frame.
- To install, reverse the removal procedure.
- Initialize the roof opening panel motor. For additional information, refer to Roof Opening Panel Motor Initialization in this section.
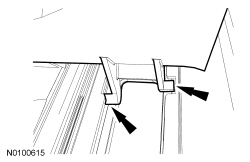
Trough Assembly
Removal and Installation
- Remove the roof opening panel glass. For additional information, refer to Roof Opening Panel Glass in this section.
- Pull the trough assembly arms outward to release the trough assembly guide arm pins from the roof opening panel frame to remove.
- Slide the trough assembly forward until the notches on the roof opening panel frame align with the tabs on the trough assembly.
- To install, reverse the removal procedure.
- Initialize the roof opening panel motor. For additional information, refer to Roof Opening Panel Motor Initialization in this section.
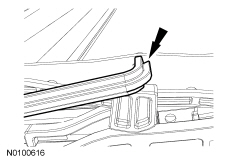
Air Deflector
Removal and Installation
- Position the roof opening panel to the full OPEN position.
- Remove the 3 screws.
- To install, tighten to 1 Nm (9 lb-in).
- Lift upward and pull to unlock the spring on each side to remove the air deflector assembly.
- To install, reverse the removal procedure.
- Initialize the roof opening panel motor. For additional information, refer to Roof Opening Panel Motor Initialization in this section.
Roof Opening Panel Control Switch
Removal and Installation
- Remove the overhead console. For additional information, refer to Section 501-12.
- Remove the light assembly from the overhead console.
- Carefully pull the 2 rear tabs outward and rotate the light assembly slightly away from the overhead console.
- Carefully pull the 2 front tabs outward and remove the light assembly from the overhead console.
- Disengage the 4 tabs and remove the switch from the light assembly.
- Disengage the 2 tabs and remove the switch bezel from the switch.
- To install, reverse the removal procedure.
 General Procedures
Timing Adjustment
NOTE: Any time a roof opening panel motor is removed, the
cables/mechanisms can experience free-play movement. It is important that the
cables do not move. They are timed to b ...
 Bumpers
SPECIFICATIONS
Torque Specifications
REMOVAL AND INSTALLATION
Bumper Cover - Front
Removal
With the vehicle in NEUTRAL, position it on a hoist. For additional
information, refer to Section 1 ...
Other materials:
SYNC®
GENERAL INFORMATION
Make sure you review your device’s manual before using it with SYNC.
Support
The SYNC support team is available to help you with any questions you
cannot answer on your own.
Monday-Saturday, 8:30am-9:00pm EST.
Sunday, 10:30am-7:30pm EST.
In the United States, call: ...
Trunk release
From Inside Your Vehicle
Press the button located on the instrument panel.
Vehicles with Intelligent Access
1. Unlock the trunk with the remote
control or power door lock control.
The trunk unlocks when you press the
release button if the intelligent access
transmitter is within 3 feet ...
Disassembly and Assembly
Seat Backrest - Front
Disassembly
Seat Backrest - Trim Parts
Seat Backrest - Frame Parts With Manual Lumbar and Static Lumbar
Seat Backrest - Frame Parts With Power Lumbar
Seat Cushion - With Active Motion
NOTE: Refer to Seat Backrest - Front for recliner-to-seat track bolt
tig ...
