SPECIFICATIONS
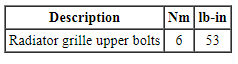
Torque Specifications
REMOVAL AND INSTALLATION
Applique - Luggage Compartment Lid
Removal and Installation
NOTE: Removal steps in this procedure may contain installation details.
-
- To install, tighten to 5 Nm (44 lb-in).

- If equipped.

-
- To install, tighten to 5 Nm (44 lb-in).
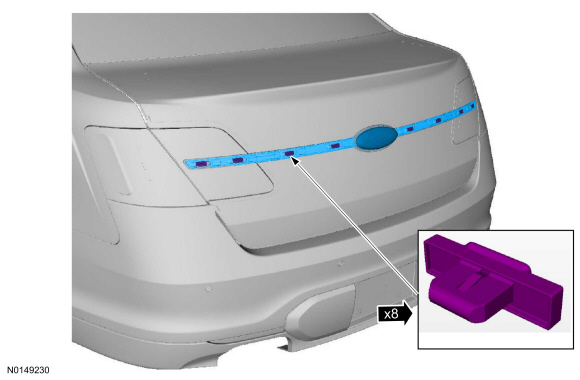
- To install, reverse the removal procedure.
Radiator Grille
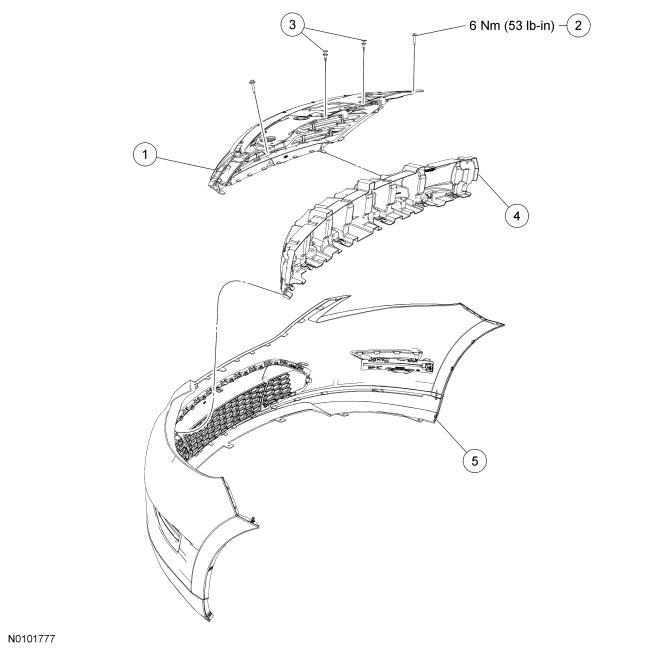

Removal and Installation
- Remove the front bumper cover. For additional information, refer to Section 501-19.
- Release the push-clip retainers and remove the bumper cover reinforcement.
- Release the retaining clips on the bumper cover and remove the radiator grille.
- To install, reverse the removal procedure.
Exterior Trim - Exploded View
Upper Trim
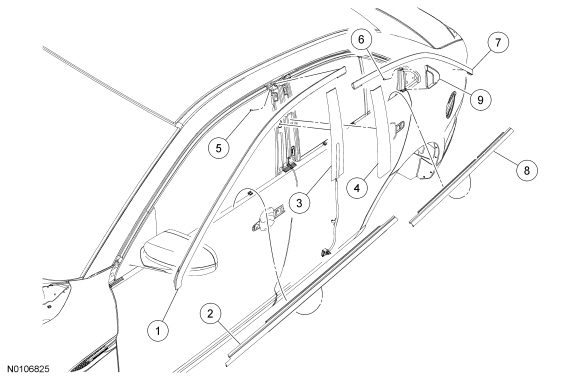
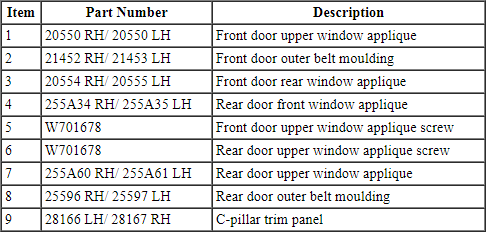
Lower Trim
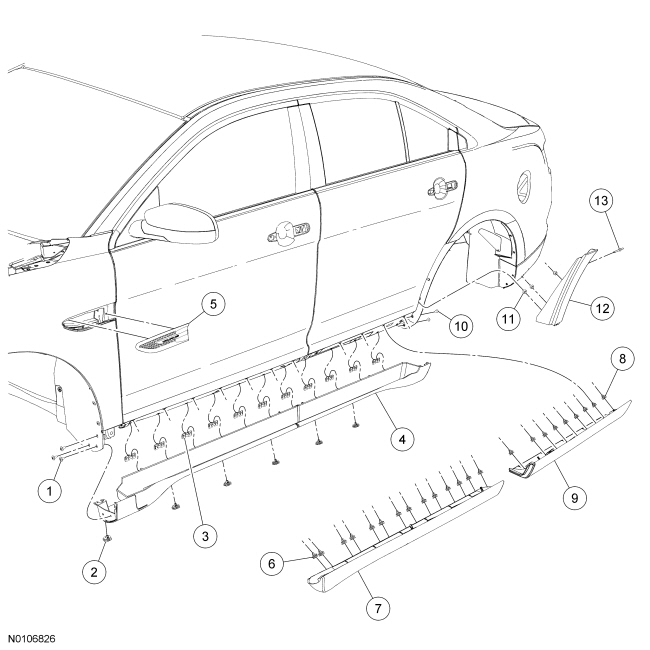
- For additional information, refer to the procedures in this section.
Fender Vent
Removal and Installation
- Remove the front fender splash shield. For additional information, refer to Section 501-02.
- Release the fender vent retaining clips through the front fender inner wheel well opening and remove the fender vent.
- To install, reverse the removal procedure.
Door Moulding - Front
Removal and Installation
NOTE: The front door moulding is a one-time use only part. If the front door moulding is removed, a new front door moulding must be installed.
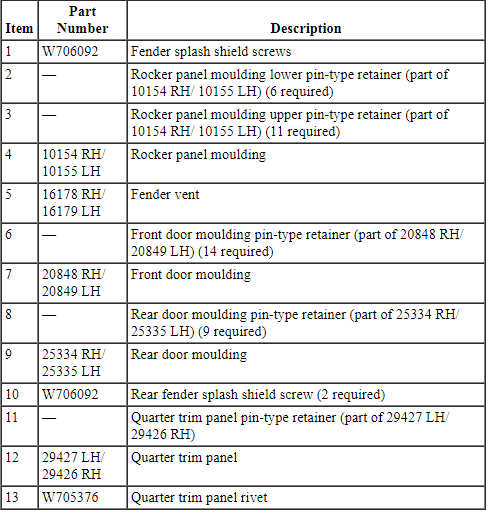
- Release the front door retaining clips.
- Start at the rear lower portion of the front door moulding, moving forward along the front door.
- Remove the front door moulding.
- To install, reverse the removal procedure.
Door Moulding - Rear
Removal and Installation
NOTE: The rear door moulding is a one-time use only part. If the rear door moulding is removed, a new rear door moulding must be installed.
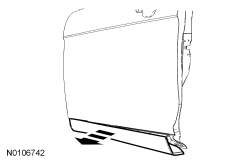
- Pull outward to release the rear door moulding retaining clips.
- Start at the rear lower portion of the rear door moulding, moving forward along the rear door.
- Remove the rear door moulding.
- To install, reverse the removal procedure.
Quarter Panel Moulding
Removal and Installation
- Remove the rocker panel moulding. For additional information, refer to Rocker Panel Moulding in this section.
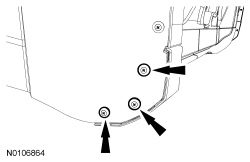
- Remove the 2 fender splash shield pin-type retainers.
- Reposition the fender splash shield to gain access to the quarter trim panel rivet.
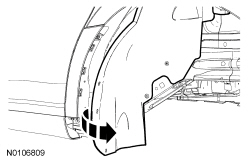
- Remove the quarter trim panel rivet.
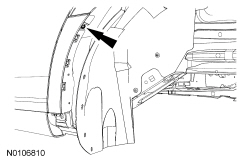
- Pull outward on the rear quarter trim panel moulding to release the clips and remove the rear quarter trim panel moulding.
- To install, reverse the removal procedure.
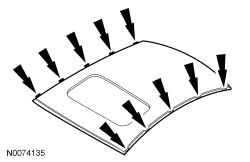
Roof Ditch Moulding
Removal and Installation
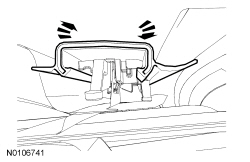
- NOTE: Push down on the outboard side of the moulding, while
pulling up on the inboard side.
Remove the roof moulding.
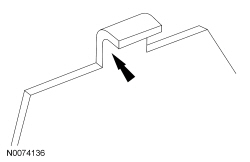
- Inspect the roof moulding retainer hooks for correct orientation.
- NOTE: The mounting hooks should have a 90-degree angle.
If necessary, adjust the retainer hooks using standard hand tools.
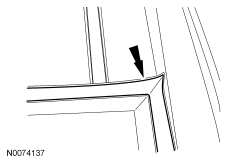
- NOTICE: Make sure the roof moulding is correctly aligned
before snapping it into place or damage to the vehicle may occur.
NOTE: The windshield moulding must sit over the roof moulding.
Install the roof moulding by snapping it onto the retainer hooks.
Rocker Panel Moulding
Removal and Installation
NOTE: The rocker panel moulding is a one-time use only part. If the rocker panel is removed, a new rocker panel must be installed.
- Open the front and rear door.
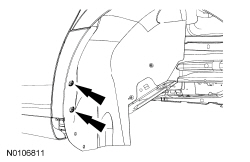
- Remove the 3 front fender splash shield pin-type retainers.
- Remove the 2 rear fender splash shield pin-type retainers.
- Release the lower rocker panel moulding retainers from the body, starting from the front of the vehicle moving rearward.
- Release the upper rocker panel moulding retainers from the body, starting from the front of the vehicle moving rearward.

- Remove the rocker panel moulding.
- To install, reverse the removal procedure.
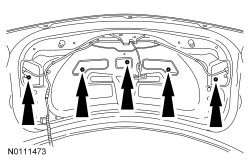
Spoiler - Rear

Removal
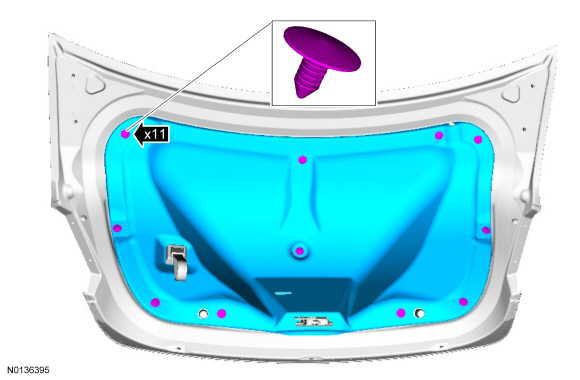
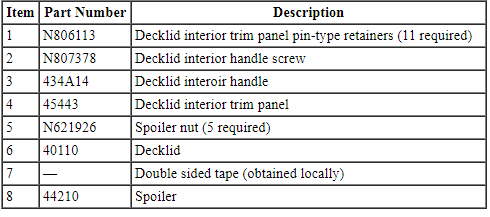
- Remove the 11 push pins and the decklid interior trim cover..
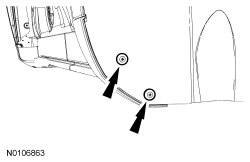
- If equipped, disconnect the rear view camera electrical connector and disconnect the 2 pin type wire harness retainers from the rear decklid.
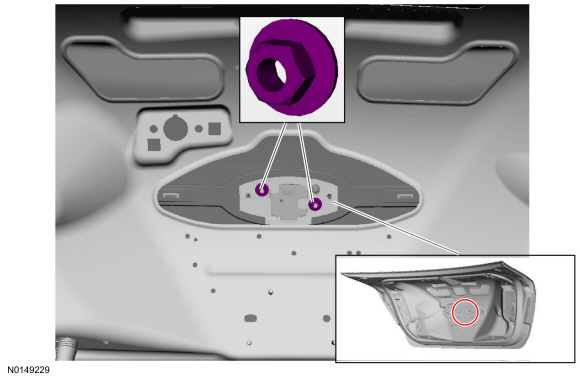
- Remove the 5 rear spoiler nuts.

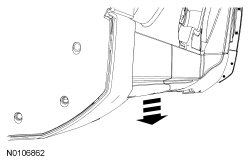
- NOTE: The rear spoiler is held on by double-sided tape.
Using a non-metal fishing line or equivalent, cut the double-sided tape.

Installation
- Clean the rear spoiler mounting surfaces.
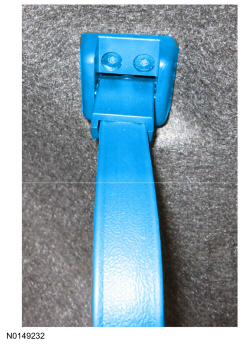
- Apply double-sided tape to the rear spoiler as shown.

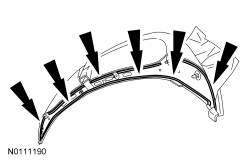
- Install the rear spoiler.
- Press the spoiler into place and apply 13.6 kg (30 lbs) of pressure along the entire length of the spoiler for 30 seconds in order to secure the adhesive.
- Install the 5 rear spoiler nuts.
- Tighten to 5 Nm (44 lb-in).
- If equipped, connect the rear view camera electrical connector and connect the 2 pin type wire harness retainers to the rear decklid.
- Install the decklid interior trim cover and install the11 push pin retainers.
 Interior Trim and Ornamentation
SPECIFICATIONS
Material
Torque Specifications
DIAGNOSIS AND TESTING
Sunshade
Special Tool(s)
Principles of Operation
Power Sunshade
The power sunshade system consists of the following:
Sunshade s ...

Other materials:
Accessory Drive
SPECIFICATIONS
Torque Specifications
DESCRIPTION AND OPERATION
Accessory Drive
Component Location
2.0L GTDI
3.5L TiVCT, 3.7L TiVCT and 3.5L GTDI
Overview
The accessory drive system provides power to operate components which power
other systems. These could include components such as the genera ...
Rear Drive Halfshafts
SPECIFICATIONS
Torque Specifications
a Refer to the procedure in this section.
DESCRIPTION AND OPERATION
Rear Drive Halfshafts
The halfshafts consist of the following components:
Inner CV joints
Outer CV joints
Interconnecting shafts
The halfshafts are splined on the outboard stub s ...
General information on radio frequencies
This device complies with part 15 of the FCC Rules and with Industry
Canada license-exempt RSS standard(s). Operation is subject to the
following two conditions: (1) This device may not cause harmful
interference, and (2) This device must accept any interference received,
including interference ...
