Headlamp Assembly
Removal
- Remove the front bumper cover. Refer to Section 501-19.
- Remove the headlamp assembly upper bolt.
- To install, tighten to 3.2 Nm (28 lb-in).
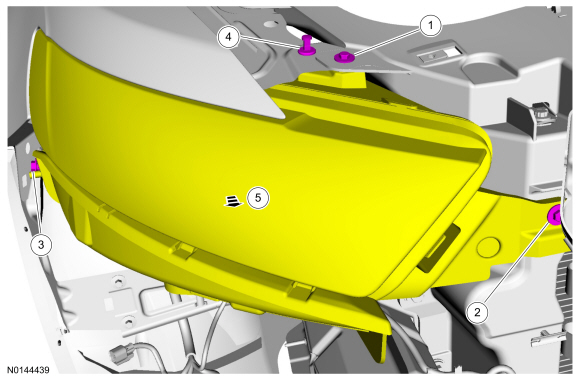
- Remove the headlamp assembly front bolt.
- To install, tighten to 3.2 Nm (28 lb-in).
- Remove the headlamp assembly side bolt.
- To install, tighten to 7 Nm (62 lb-in).
- Remove the rivet push-pin.
Installation
- To install, reverse the removal procedure.
Headlamp Assembly - Police Package
Removal
- Remove the front bumper cover. For additional information, refer to Section 501-19.
- Remove the headlamp assembly upper bolt.
- To install, tighten to 3.2 Nm (28 lb-in).

- Remove the headlamp assembly front bolt.
- To install, tighten to 3.2 Nm (28 lb-in).
- Remove the headlamp assembly side bolt.
- To install, tighten to 7 Nm (62 lb-in).
- Remove the rivet push-pin.
Installation
- To install, reverse the removal procedure.
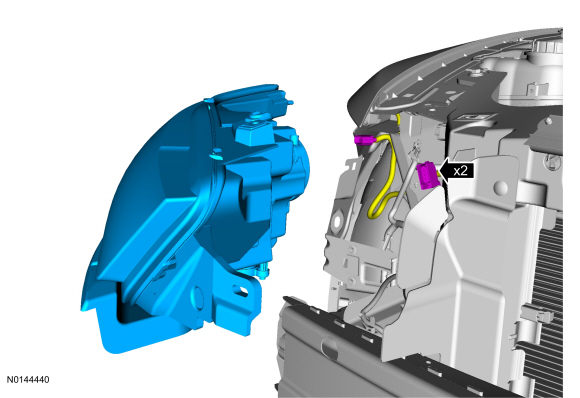
Headlamp Bulb
NOTE: The air cleaner is shown removed for clarity.
NOTE: The HID bulb is shown, the halogen bulb is similar.

Removal and Installation
WARNING: The bulb contains gas under pressure. The bulb may shatter if the glass envelope is scratched or if the bulb is dropped. Handle the bulb only by its base. Avoid touching the glass envelope. Failure to follow these instructions may result in personal injury.
NOTE: The headlamp bulb should not be removed from the headlamp assembly until just before a new bulb is installed. Removing the bulb for an extended period of time may affect headlamp bulb performance. Contaminants may enter the headlamp assembly where they can settle on the lens and reflector. Never turn on the headlamps with the bulb removed from the headlamp assembly.
NOTE: Make sure the headlamp switch and ignition switch are in the OFF position.
- Remove the headlamp bulb access cover.
- Rotate the headlamp bulb one-eighth turn counterclockwise and remove the
headlamp bulb.
- Disconnect the electrical connector.
- To install, reverse the removal procedure.
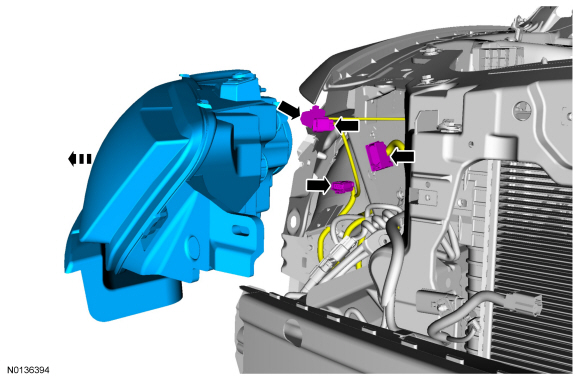
Headlamp Bulb - Police Package
NOTE: High Intensity Discharge (HID) bulb shown, halogen similar.
NOTE: The air cleaner is shown removed for clarity.


Removal and Installation
WARNING: The bulb contains gas under pressure. The bulb may shatter if the glass envelope is scratched or if the bulb is dropped. Handle the bulb only by its base. Avoid touching the glass envelope. Failure to follow these instructions may result in personal injury.
NOTE: The headlamp bulb should not be removed from the headlamp assembly until just before a new bulb is installed. Removing the bulb for an extended period of time may affect headlamp bulb performance. Contaminants may enter the headlamp assembly where they can settle on the lens and reflector. Never turn on the headlamps with the bulb removed from the headlamp assembly.
NOTE: Make sure the headlamp switch and ignition switch are in the OFF position.
- Remove the headlamp bulb access cover.
- Rotate the headlamp bulb one-eighth turn counterclockwise and remove the
headlamp bulb.
- Disconnect the electrical connector.
- To install, reverse the removal procedure.
Ballast

Removal and Installation
- Remove the headlamp assembly. For additional information, refer to Headlamp Assembly in this section.
- Remove the 4 screws and the ballast.
- Disconnect the electrical connectors.
- To install, reverse the removal procedure.
Parking Lamp - Auxiliary

Removal and Installation
- Remove the front lower air deflector. For additional information, refer to Bumper - Exploded View, Front in Section 501-19.
- Release the tabs and remove the auxiliary parking lamp.
- Disconnect the electrical connector.
- To install, reverse the removal procedure.
Side Lamp/Front Turn Signal Lamp Bulb
Removal and Installation
Front park/turn lamp
Side marker lamp
- Remove the 3 screws and position the fender splash shield aside.
Any lamp
- Rotate the bulb holder approximately one-eighth turn counterclockwise
and remove it from the headlamp assembly.
- Disconnect the electrical connector.
- If necessary, remove the bulb from the holder.
- To install, reverse the removal procedure.
Headlamp Switch
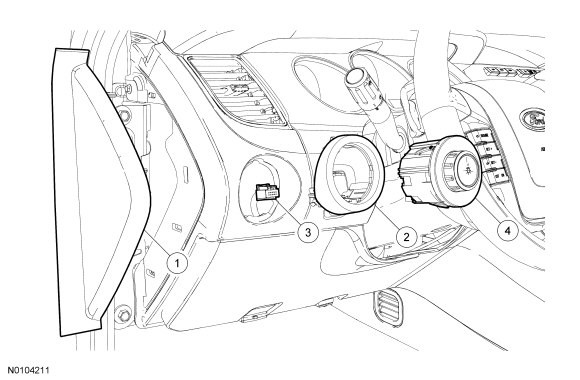
Removal and Installation
- Remove the instrument panel side finish panel.
- NOTE: The 3 retaining tabs on the headlamp switch bezel are
located at approximately the 5, 8 and 12 o'clock positions when viewed from
the front.
Reaching from behind, release the 3 tabs and push the headlamp switch and bezel through the opening.
- Disconnect the electrical connector.
- NOTE: The 3 retaining tabs on the headlamp switch are located at
approximately the 3, 7 and 11 o'clock positions when viewed from the front.
Release the 3 tabs and separate the headlamp switch from the bezel.
- To install, reverse the removal procedure.
Stoplamp Switch

Removal
- Disconnect the stoplamp switch electrical connector.
- NOTE: The stoplamp switch is difficult to remove if the switch
plunger is not depressed. A slight rearward force on the brake pedal should
be adequate to depress the plunger.
With a light force, pull rearward on the brake pedal, rotate the stoplamp switch 45 degrees clockwise and remove the stoplamp switch.
- Disconnect the stoplamp switch electrical connector.
Installation
NOTICE: It is very important to not press, pull or touch the brake pedal assembly during the installation of the stoplamp switch. Failure to follow these instructions may damage the stoplamp switch.
- Without movement of the brake pedal assembly, install the stoplamp switch and rotate it 45 degrees counterclockwise.
- Connect the stoplamp switch electrical connector.
- NOTE: If the stoplamps do not operate correctly, repeat the
removal and installation procedure with special attention not to move or
touch the brake pedal during installation.
Start the engine and apply the brake pedal several times to make sure the stoplamps operate correctly.
Light Sensor

Removal and Installation
- Using a suitable tool (such as a pocket screwdriver), remove the light
sensor.
- Disconnect the electrical connector.
- To install, reverse the removal procedure.
Puddle Lamp

Removal and Installation
- NOTE: Use a plastic thin flat-bladed tool (such as a pocket
screwdriver) to release the tab.
Release the tab from the underside of the mirror and remove the puddle lamp.
- Disconnect the electrical connectors.
- To install, reverse the removal procedure.
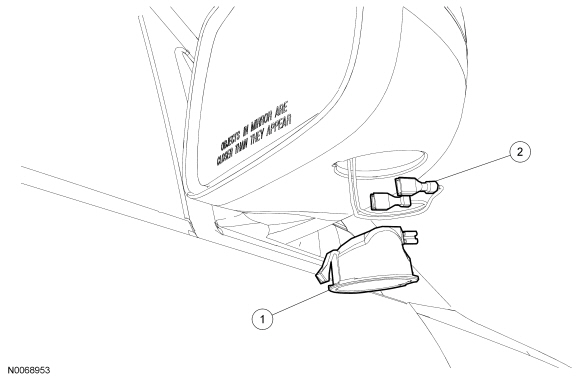
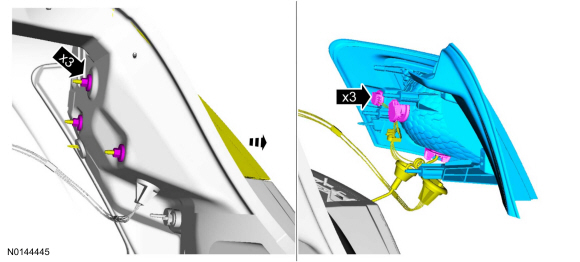
High Mounted Stoplamp
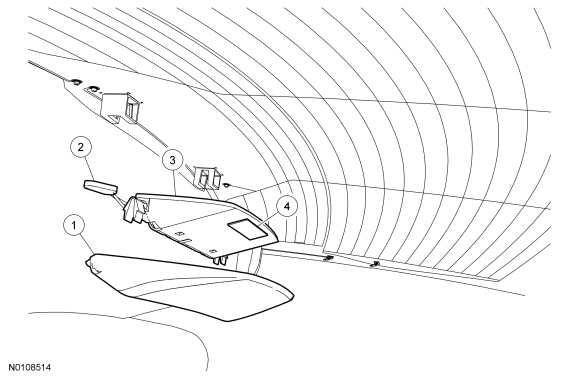
Removal and Installation
- Remove the LH rear head restraint. For additional information, refer to Disassembly and Assembly, Seat Backrest - Rear in Section 501-10.
- NOTE: The high mounted stoplamp cover is attached to the base
with hook-and-loop strips.
Slide finger between the base and the cover to separate the hook-and-loop strip(s).
- Grasp the sides and pull the cover down to separate it from the high mounted stoplamp.
- Using a thin plastic flat-bladed tool, carefully unsnap the high mounted stoplamp connector from the rear window.
- Squeeze the 2 tabs and release the high mounted stoplamp from the rear window.
- To install, reverse the removal procedure.
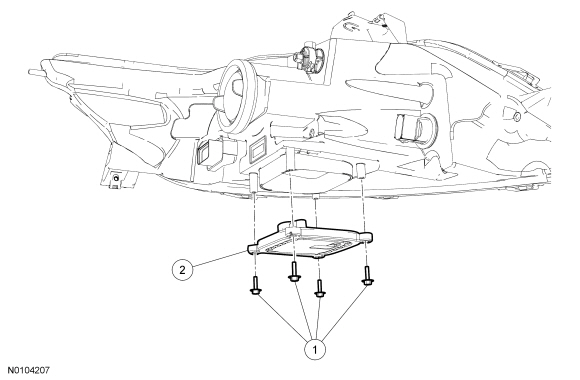
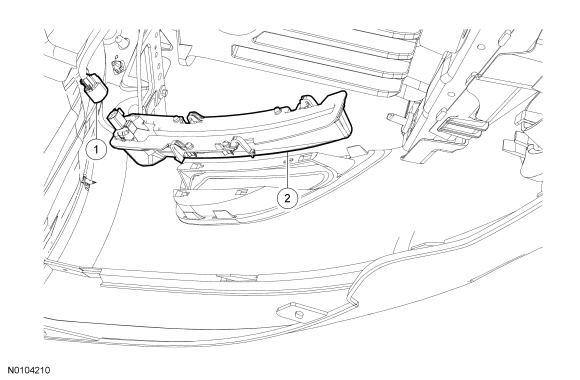
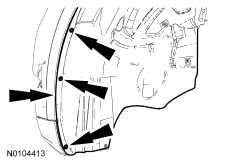
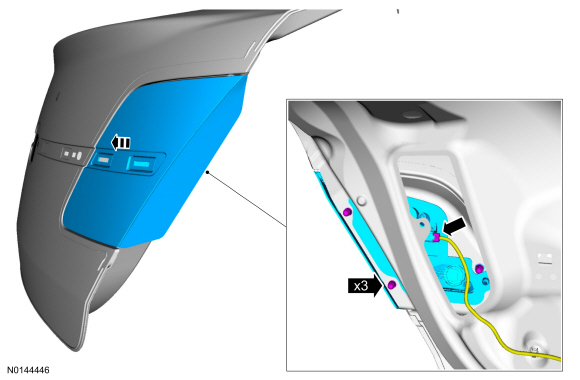
Rear Lamp Assembly
Removal
- Position the luggage compartment side trim panel aside.
-
- To install, tighten to 6 Nm (53 lb-in).
Installation
- To install, reverse the removal procedure.
Rear Lamp Assembly - Police Package
Removal
- Position the luggage compartment side trim panel aside.
-
- To install, tighten to 6.2 Nm (55 lb-in).
Installation
- To install, reverse the removal procedure.
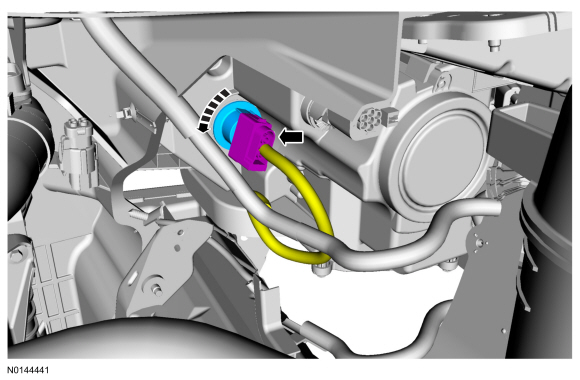
Reversing Lamp
Removal and Installation
NOTE: Police vehicle is shown, base vehicle is similar.
- Remove the luggage compartment lid applique. For additional information, refer to Section 501-08.
-
- To install, tighten to 2.5 Nm (22 lb-in).
Installation
- To install, reverse the removal procedure.
 General Procedures
Headlamp Adjustment
Special Tool(s)
Headlamp Adjustment Screw Location
Headlamp Aiming
The headlamp aiming procedure depends on what type of beam pattern the
headlamp is equipped with. Vehicles ...
 Interior Lighting
DESCRIPTION AND OPERATION
Interior Lighting
Overview
The interior lighting system consists of:
Courtesy lamps
Demand lamps
Ambient lighting (if equipped)
The courtesy lamps subsystem consists of: ...
Other materials:
Diagnosis and Testing
Exterior Lighting
DTC Charts
Diagnostics in this manual assume a certain skill level and knowledge of
Ford-specific diagnostic practices. Refer to Diagnostic Methods in Section
100-00 for information about these practices.
BCM DTC Chart
SCCM DTC Chart
IPM-A&nb ...
Appendices
GENERAL INFORMATION
SYNC® End User License Agreement (EULA)
• You have acquired a device (“DEVICE”) that includes software
licensed by Ford Motor Company and its affiliates (“FORD MOTOR
COMPANY”) from an affiliate of Microsoft Corporation (“MS”). Those
installed software products ...
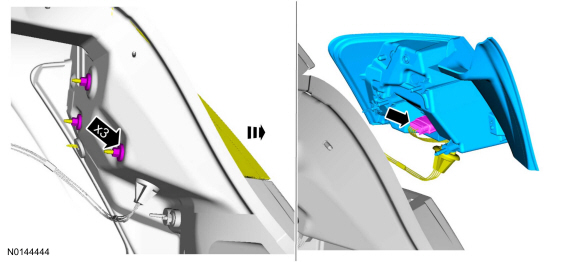
Removal and Installation
Exterior Mirror
Removal and Installation
NOTE: Do not remove the exterior mirror assembly when repairing an
individual part. Individual components can be installed without removing the
exterior mirror.
Remove the sail panel.
Pull outward on the sail panel to release the retaining clips.
...
