SPECIFICATIONS
Material
Torque Specifications
DESCRIPTION AND OPERATION
Engine Emission Control
Component Locations
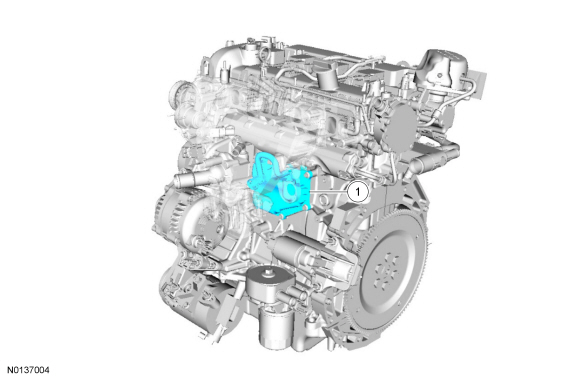
2.0L GTDI

3.5L Ti-VCT and 3.7L Ti-VCT

3.5L GTDI
System Operation
Refer to the PC/ED manual section 1 Description and Operation.
Component Description
Refer to the PC/ED manual section 1 Description and Operation.
DIAGNOSIS AND TESTING
Engine Emission Control
For PCM DTCs, refer to Section 303-14 DTC Chart: PCM. For driveability symptoms without DTCs, refer to the PC/ED manual, section 3 Symptom Charts.
REMOVAL AND INSTALLATION
Crankcase Vent Oil Separator - 2.0L GTDI
Removal and Installation
NOTE: Removal steps in this procedure may contain installation details.
- Remove the intake manifold. For additional information, refer to Section 303-01C.
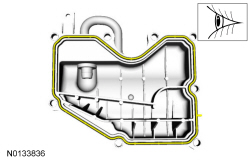
- NOTE: Clean and inspect the gasket mating surfaces.
- Tighten to 10 Nm (89 lb-in).
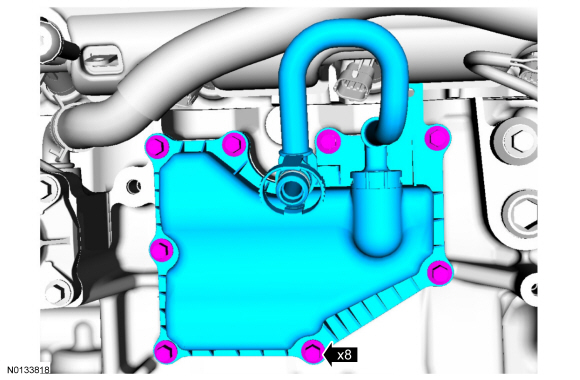
- Inspect and replace the crankcase vent oil separator gasket as necessary. Visual check.
- To install, reverse the removal procedure.
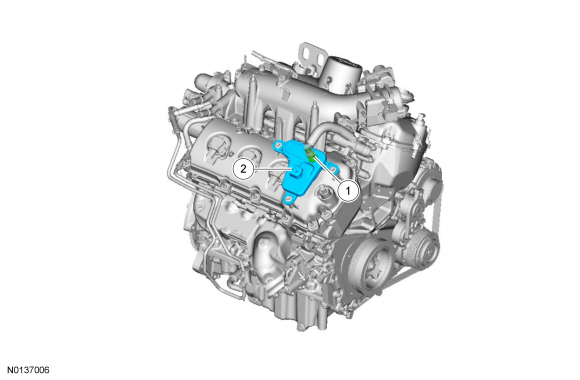
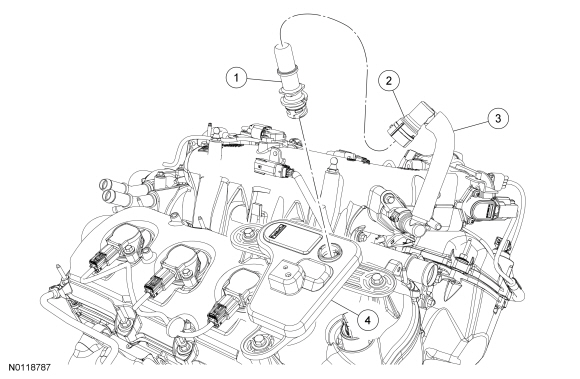
Crankcase Vent Oil Separator - 3.5L GTDI
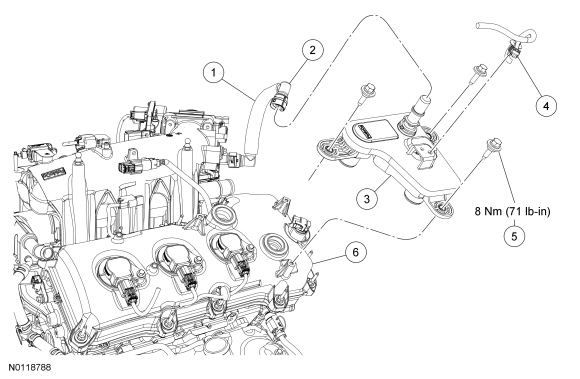
Removal and Installation
- Release the wire harness pin-type retainer from the crankcase vent oil separator.
- Disconnect the crankcase ventilation tube-to-PCV valve quick connect coupling. For additional information, refer to Section 310-00.
- Remove the 3 crankcase vent oil separator bolts.
- To install, tighten to 8 Nm (71 lb-in).
- Remove the crankcase vent oil separator from the RH valve cover.
- To install, reverse the removal procedure.
Positive Crankcase Ventilation (PCV) Valve - 3.5L Ti-VCT
Material
Removal and Installation
NOTE: Removal steps in this procedure may contain installation details.

- NOTICE: A new PCV valve
must be installed if removed from the valve cover. Damage will occur to the
locking mechanism on the PCV valve.
Minor component movement CCW. Discard the specified component. Follow local disposal regulations.

- To install, reverse the removal procedure. Apply the specified lubricant to the specified component.

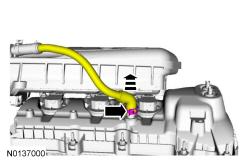
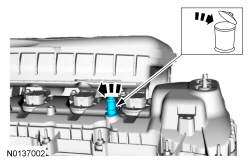
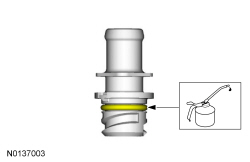
Positive Crankcase Ventilation (PCV) Valve - 3.5L GTDI
Material
Removal and Installation
- Disconnect the crankcase ventilation tube-to-PCV valve quick connect coupling. For additional information, refer to Section 310-00.
- NOTICE: A new PCV valve must be installed if removed from the
valve cover. Damage will occur to the locking mechanism on the PCV valve.
NOTE: To install, apply clean engine oil to the O-ring seal.
Rotate the PCV valve counterclockwise and remove from the crankcase vent oil separator.- Discard the PCV valve.
- To install, reverse the removal procedure.
- Install a new PCV valve.
Positive Crankcase Ventilation (PCV) Valve - 3.7L Ti-VCT
Material
Removal and Installation
NOTE: Removal steps in this procedure may contain installation details.
- NOTICE: A new PCV valve
must be installed if removed from the valve cover. Damage will occur to the
locking mechanism on the PCV valve.
Minor component movement CCW. Discard the specified component. Follow local disposal regulations.
- To install, reverse the removal procedure. Apply the specified lubricant to the specified component.
 Engine Ignition - 3.7L Ti-VCT
SPECIFICATIONS
Material
General Specifications
Torque Specifications
DESCRIPTION AND OPERATION
Engine Ignition
Component Location
3.7L Ti-VCT
System Operation
REFER to the PC/ED m ...
 Intake Air Distribution and Filtering
SPECIFICATIONS
Material
Torque Specifications
DESCRIPTION AND OPERATION
Intake Air Distribution and Filtering
2.0L GTDI
The air intake system consists of the:
ACL assembly.
ACL&nbs ...
Other materials:
Recommended towing weights
Note: Do not exceed the trailer weight for your vehicle configuration
listed in the chart below.
Note: Make sure to take into consideration trailer frontal area. Do not
exceed 12 feet2 (1.11 meters2) trailer frontal area.
Note: For high altitude operation, reduce the gross combined weight by ...
Acceleration Control
SPECIFICATIONS
Torque Specifications
DESCRIPTION AND OPERATION
Acceleration Control
The acceleration controls consist of the accelerator pedal and sensor
assembly.
The engine management system electronically operates the throttle of the
engine in response to throttle pedal movements initiated by ...
Autolamps
WARNING: In severe weather conditions, it may be necessary to
switch your headlamps on manually.
Note: If the vehicle is equipped with autolamps, it will have the
windshield wiper rainlamp feature. When the windshield wipers are
turned to low- or high-speed wiping during daylight, and the headla ...
